Estimated reading time: 8 minutes
This blog has thorough instructions on how to resolve Minecraft exit code 1 in windows 10/11.
Minecraft is a trendy game, and when it makes such errors, it usually plays spoilsport.
Exit code -1 is not a problematic error; the user can quickly solve it.
This blog provides all the causes and different fixes for this problem.
So let’s get started!
Table of contents
Minecraft exit code 1 in Windows 10 or 11
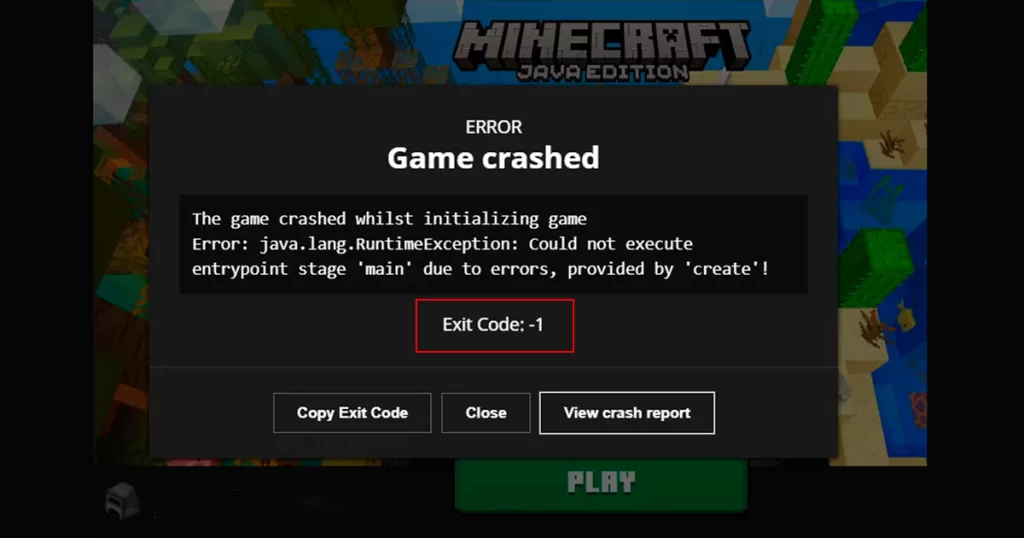
The error code for Minecraft exit code -1 on Windows 10 or 11 denotes a game crash. Exit Code: 1 is the standard error message, and it may also include additional details like an explanation of the error or a list of error codes.
What is the reason for this error?
Exit Code: 1 Error can be caused by a number of things, such as outdated game files, incompatible or corrupted mods, and hardware or software problems. You should investigate the precise cause of the issue to resolve the error.
Removing incompatible mods, updating the game to the most recent version, giving the game additional memory, or updating your computer’s graphics drivers are typical fixes.
How to fix minecraft exit code 1?
As said earlier, there may be numerous reasons for Minecraft Exit Code 1. We have listed below all possible methods in this article to fix this error. Before applying any of these methods, you should read the whole article carefully, try to figure out the exact reason for this fault, and then apply these methods one by one.
Fix 1) Java reinstallation
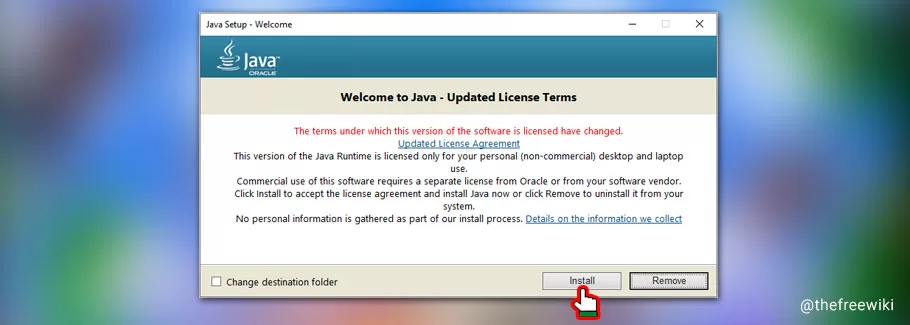
Java configuration is a major cause of the issue; hence, the first solution would be reinstalling Java. This will help fix all the bugs and can also be a solution for fixing this error code 1.
Steps to reinstall Java :
Step 1)Go to https://www.java.com/en/download/manual.jsp
Step 2)Follow the installation instructions after downloading the file.
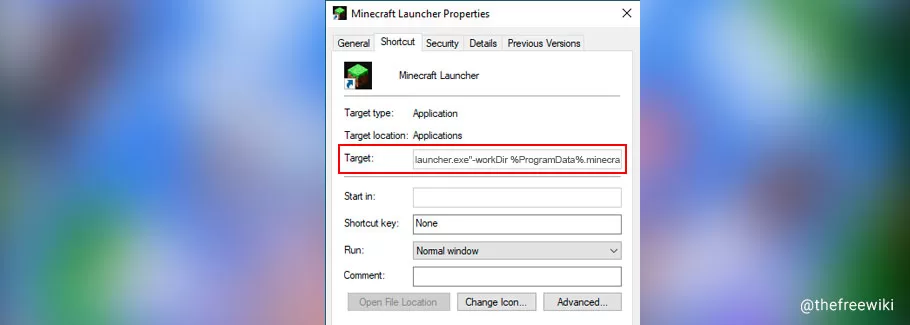
Fix 2) Make Changes in the Minecraft launcher path (File shortcut)
Sometimes, while creating a file shortcut of Minecraft Launcher to the desktop, special characters like $,!, etc., in your Minecraft user ID block the path of the “game directory.”
Steps to fix the issue:
1. Right-click on the “Minecraft Launcher” icon.
2. Click “Properties.”
3. Add -workDir %ProgramData%.minecraft and the end of the “target” field.

4. Now, click “OK” and relaunch Minecraft.
Fix 3) Update Minecraft
You should ensure that your device has the most recent game version.
If the problem still exists, try reverting to an earlier version of the game to see if that fixes it.
If the game isn’t up to date, a notification that an update is available should appear in the Minecraft launcher.
To begin the update procedure, click the “Update” button.
- Click the “Installations” tab in the Minecraft launcher if the update notification does not appear.
- Locate the installation that needs updating and click the three-dot icon next to it.
- From the dropdown menu, choose “Edit.”
- Locate the “Version” dropdown menu by scrolling down and choosing the most recent Minecraft release.
- Press the “Save” button to keep your modifications.
- Restarting Minecraft should cause it to update to the most recent version.
Depending on the platform you use to play Minecraft on a console or mobile device, the update procedure could differ. Normally, you should be able to update the game via the system settings or the app store.
Fix 4) Modification of Mods
- Uninstall any mods or plugins incompatible with the game version or other mods or plugins; this is a common cause of the Minecraft Exit Code 1 error. Even optifine can cause such an error. So uninstall each mod individually and try playing the game to find the culprit mode.
- Check to see if the game launches properly by attempting to uninstall the most recent mod or plugin you installed. Alternatively, try turning off every mod or plugin and then turning them back on one at a time until you find the one causing the problem.
- Observe these instructions to delete modifications or plugins from Minecraft:
- Open the Minecraft game and select the “Mods” or “Plugins” tab from the top menu, depending on the type of add-on you want to uninstall.
- Locate the plugin or mod you wish to uninstall and click it to select it.
- To remove the mod or plugin from your game, click the “Delete” button or icon. A confirmation question can appear after the deletion.
- Restart the game after removing the mod or plugin to ensure it is no longer loaded.
- If a mod or plugin was manually installed, you could also remove it by removing its files from your game directory. Follow these steps to achieve it :
- Switch on your laptop or PC and open the folder in which minecraft is installed.
- In accordance with the add-on you want to remove, open mods or plugin folder
- Search for the folder and delete all the files related to the mods or plugins you do not require.
- Restart the PC and open Minecraft and ensure the plugin or mod has not been loaded
It is crucial to remember that compatibility problems or errors can occasionally arise when mods or plugins are removed from Minecraft.
Fix 5) Repairing the corrupt files
Corrupt or damaged game files may need to be repaired or deleted to fix the problem. To fix this, you can try using the game’s repair tool or removing the game’s data before uninstalling and reinstalling Minecraft.
Fix 6) RAM allocation
More RAM should be allocated because Minecraft needs a particular amount of memory to function correctly. The game might not launch properly and give you an exit code 1 error if it does not have adequate RAM. By changing the start parameters for the game, you can attempt to give Minecraft extra memory.
How to do this?
- Open the Minecraft launcher and go to the “Installations” tab.
- Click on the installation profile if you want to allocate more memory.
- Click on the “More Options” button, located under the name of the installation profile.
- Locate the “JVM Parameters” field, then scan the line for the word “-Xmx.” The maximum amount of memory that Minecraft can use is determined by this line.
- To give the game more memory, increase the amount following “-Xmx”. For instance, if the value is now “-Xmx2G,” you can modify it to “-Xmx4G” to give the game 4GB of memory.
- After editing the value, click the “Save” button to save the changes.
- Launch the game and check the allocated memory in the game’s F3 debug menu.
It is crucial to note that giving Minecraft more RAM than it needs to function properly can result in performance problems. Therefore, we advise only to give what it requires. The ideal amount of memory will vary depending on the capabilities of your computer and the games you want to play.
If you encounter problems after allocating extra memory, think about lowering the amount of RAM that has been allocated.
Fix 7) Update the computer
Check for updates on your computer. Sometimes Minecraft Exit Code 1 occurs due to not having updates on your pc. Make sure all required updates are installed on your machine. This covers the operating system, graphics card, and Java updates.
These are a few methods for resolving the Minecraft exit code 1 error. It is advisable to contact the game’s support staff for more assistance if none of these fixes work.
Fix 8) Log files
Go through the game’s log files for errors or warning messages that can illuminate the issue’s root cause.
While looking for solutions, utilize the error message as a roadmap.
Go to the game directory for Minecraft.
The default directories of Windows 10/11 are:
- Windows: %appdata%.minecraft
- Locate the “logs” folder in the game directory.
- Locate the “latest.log”-format log file and open it in a text editor.
- Look through the log file for any errors or warning messages that point to the source of your issue.
- If you face an “error” message, you can check it online for a solution.
- If you are still getting familiar with the log format, it may be challenging to pinpoint the root of a problem because the log file contains a lot of information.
- Consider asking for assistance from the Minecraft community or the game’s support staff if you are having problems deciphering the log file or determining the root of any problem.
FAQs
Yes, “exit 1” in Minecraft would typically be considered an error. Multiple reasons, such as Java configuration, corrupt mods, or launcher path, might lead to this issue.
Conclusion
After reading the blog, we hope you understand how to resolve the problem. Our team of professionals has tested all the fixes stated above. Please post your questions in the comments section below.

